Golden
Era Model Service
High
Quality Plan Sets for Radio Control Aircraft
74 inch San Josè
A 1948 design by Antonio Arria
1/21/2016

Before
assembling the wing panels, verify that your spars are the proper
dimensions to slide snugly in to the ribs. If they are too tight
sand the spars until they fit properly.
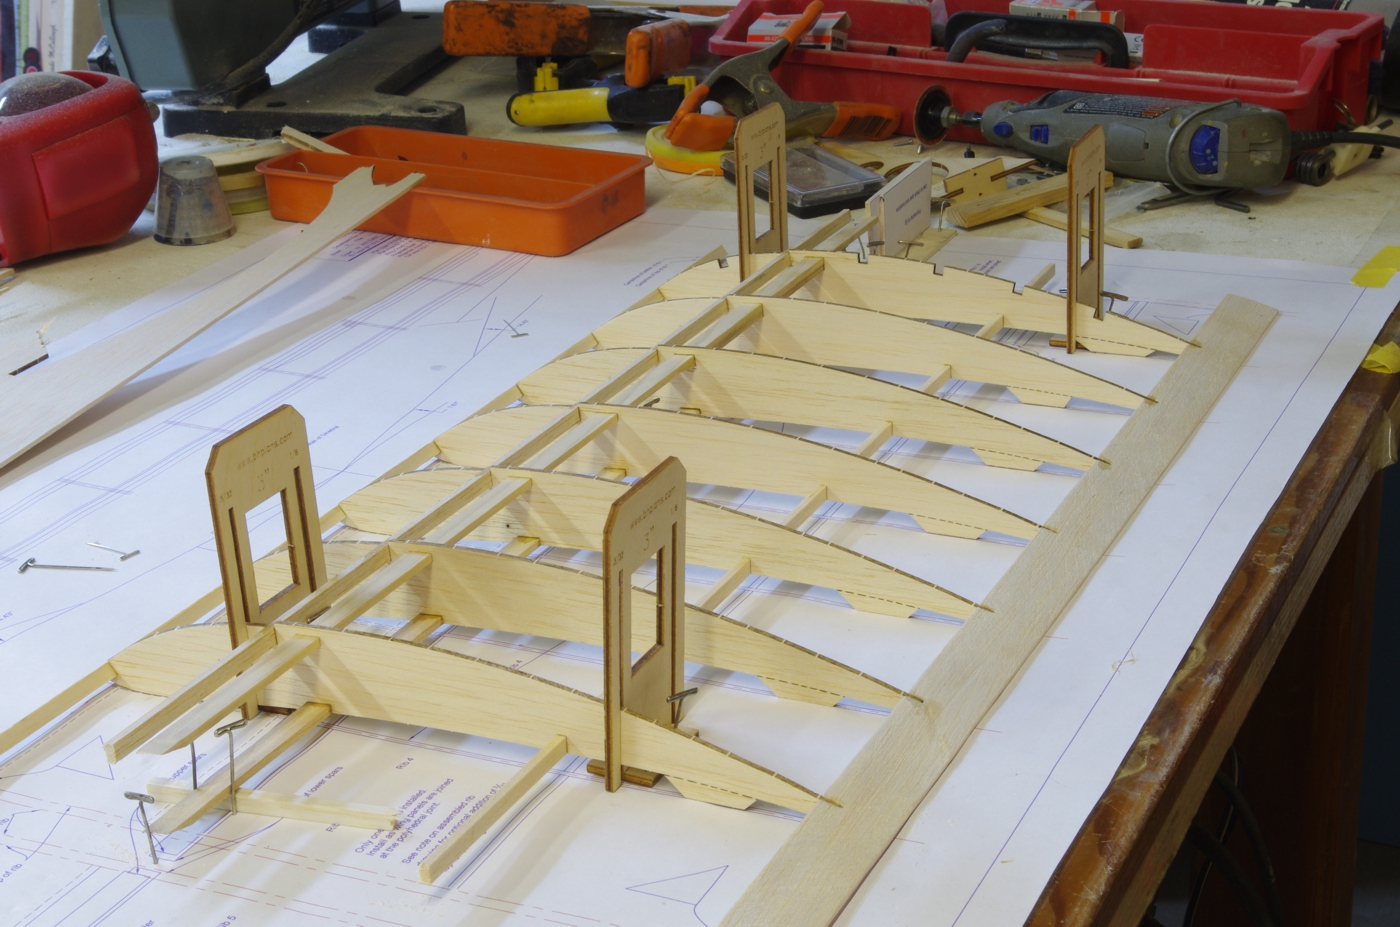
The
image above and the two following are of the left wing panel parts
which I built second. I put them here as I felt they gave a
better picture of the initial steps in alignment of the
spars and ribs. In this photo the outboard end
of the lower spar is blocked up and trapped by pins in the correct
position. The rib is pressed on to the spar to locate it fore and aft.
The upper spar doublers are installed
to the upper spars before the ribs are slid on, using the center dihedral brace as
a jig to locate them the proper distance from the ends of the spars.
The ribs will be slipped on to the upper spar first and slid into
their approximate locations, then once the ribs are in the final
position the lower
spar will be pulled up into each rib sequentially from one end to the other.

A
laser cut jig is supplied to set the positions of the spars at the root
end. There are marks on the plan to position the jig.The root end of the spar is against the root jig and pinned fore and aft.

I slipped all of the ribs on the upper spar, and pulled the lower spar up into position. Then the root rib 2 and the last rib 4 were positioned accurately, and after checking the spar locations at the
jig, those two ribs were tack glued. Bob Holman's fixtures come in real handy for this task. (bhplans.com) Then, the remaining ribs were postioned accurately and tack glued.

A
partially assembled right inner wing panel. The trailing edges
are fabricated from 1/4 X 1 soft balsa sawn from 3 inch sheet. I
get better weight and straighter
wood from sheets than
when I buy it in precut widths and it is less expensive. See the
cross section drawing on the plan for the profile to plane and file to.
Notch for the ribs. Three
lengths of 1/4 square were sawn from the same sheet for the leading
edges. When installing the trailing edges make sure the bottom
of the ribs are even with the bottom of the trailing edge and the aft edge of the trailing edge touches the building board.
As
all the fabricated parts were done as the right wing panel was built,
the left one progressed rapidly. I left the leading edge 1/4
square uncut and
built the polyhedral section before I cut it. I left all the
auxilliary spars and the leading edge long and will cut them after the
spars are joined.
Previous San Josè page GEMS
Index Page John Eaton's
Home Page
San Jose First Page Next San Josè page